10 Easy DIY Home Decor Steps for Beginners
Introduction to 10 Easy DIY Home Decor Steps for Beginners
Are you ready to transform your living space with some easy and fun DIY home decor projects? Whether you’re a seasoned crafter or a complete beginner, these projects are perfect for adding a personal touch to your home. DIY home decor not only saves you money but also allows you to create unique pieces that reflect your personality and style. Let’s dive into 10 simple yet stunning DIY home decor steps for beginners that anyone can tackle.
Step 1: Painted Mason Jars

Materials Needed
- Mason jars
- Acrylic paint
- Paintbrushes
- Sandpaper (optional for distressing)
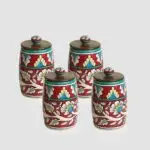
10 Easy DIY Home Decor Steps for Beginners – Painted Mason Jars
- Clean the Jars: Ensure your mason jars are clean and dry.
- Paint the Jars: Apply a coat of acrylic paint to the outside of the jars. You can use one color or multiple for a more colorful display.
- Let Dry: Allow the paint to dry completely. This may take a few hours.
- Distress (Optional): Use sandpaper to lightly distress the edges for a rustic look.
- Display: Use your painted mason jars as vases, utensil holders, or decorative pieces around your home.
Step 2: Custom Wall Art
Materials Needed
- Canvas or thick paper
- Acrylic paints or markers
- Painter’s tape (optional)
- Paintbrushes
10 Easy DIY Home Decor Steps for Beginners – Custom Wall Art
-

Creating custom wall art as one of the 10 easy DIY home decor steps for beginners.” Plan Your Design: Decide on a design for your wall art. This could be abstract, geometric, or something more detailed.
- Prepare the Canvas: If using painter’s tape, apply it to create clean lines or shapes.
- Paint: Apply your chosen colors to the canvas. Experiment with different techniques like blending or stippling.
- Remove Tape (If Used): Carefully remove the painter’s tape once the paint is dry.
- Hang Your Art: Once fully dry, hang your custom art piece on your wall.
Step 3: Decorative Throw Pillows
Materials Needed
- Plain throw pillow covers
- Fabric paint or markers
- Stencils (optional)
- Brushes or sponges
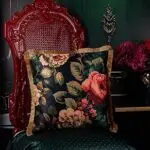
10 Easy DIY Home Decor Steps for Beginners – Decorative Throw Pillows
-

10 Easy DIY Home Decor Steps for Beginners Choose a Design: Decide on a design or pattern for your pillows.
- Prep the Covers: Lay the pillow covers flat on a protected surface.
- Apply Paint: Use fabric paint and stencils (if desired) to create your design. Be creative with colors and patterns.
- Dry and Set: Let the paint dry completely before putting the covers back on the pillows.
- Decorate: Place your new decorative pillows on your couch or bed to add a pop of color and personality.
Step 4: Upcycled Furniture
Materials Needed
- Old piece of furniture (e.g., chair, table)
- Sandpaper
- Paint or wood stain
- Brushes
10 Easy DIY Home Decor Steps for Beginners – Upcycled Furniture
- Prep the Furniture: Clean and sand down the furniture to remove old finishes and smooth the surface.
- Choose a Finish: Decide whether you want to paint or stain the piece.
- Apply Finish: Apply paint or stain evenly, following the wood grain if staining. Multiple coats may be needed.
- Dry Completely: Allow the finish to dry thoroughly between coats.
- Showcase Your Work: Place your upcycled furniture in your home and enjoy the new look.
Step 5: DIY Floating Shelves
Materials Needed
- Wooden boards
- Brackets
- Screws and anchors
- Drill
10 Easy DIY Home Decor Steps for Beginners – DIY Floating Shelves
- Measure and Cut: Measure the space where you want the shelves and cut the boards to fit.
- Attach Brackets: Secure the brackets to the wall using screws and anchors.
- Mount the Shelves: Place the wooden boards on the brackets and secure them in place.
- Decorate: Arrange books, plants, or decorative items on your new floating shelves.
Step 6: Handmade Candles
Materials Needed
- Candle wax
- Wicks
- Essential oils
- Candle molds or containers
10 Easy DIY Home Decor Steps for Beginners – Handmade Candles
- Melt the Wax: Use a double boiler to melt the candle wax.
- Add Scents: Once melted, add a few drops of essential oils for fragrance.
- Prepare the Molds: Place the wicks in the center of your molds or containers.
- Pour the Wax: Carefully pour the melted wax into the molds, keeping the wicks centered.
- Cool and Set: Allow the candles to cool and set completely before removing them from the molds.
Step 7: Plant Holders
Materials Needed
- Small pots or containers
- Macrame cord or twine
- Scissors
10 Easy DIY Home Decor Steps for Beginners – Plant Holders
- Measure Cord: Cut several lengths of cord or twine.
- Tie Knots: Create a series of knots to form a net-like structure for holding the pots.
- Assemble Holder: Arrange the cords and tie them together to secure the pot in place.
- Hang: Hang your plant holder from a hook in your home.
Step 8: Photo Display Board
Materials Needed
- Corkboard or wooden board
- Paint or stain
- Clothespins or clips
10 Easy DIY Home Decor Steps for Beginners – Photo Display Board
- Prepare the Board: Paint or stain the board to match your decor.
- Display: Hang your photo display board in a prominent place.
Step 9: Decorative Mirrors
Materials Needed
- Plain mirror
- Paint or decorative trim
- Glue or adhesive
10 Easy DIY Home Decor Steps for Beginners – Decorative Mirrors
- Design the Frame: Plan how you want to decorate the mirror frame.
- Apply Decorations: Paint the frame or attach decorative trim using glue or adhesive.
- Let Dry: Allow any paint or glue to dry completely.
- Hang: Hang your decorative mirror in your chosen spot.
Step 10: Customized Doormat
Materials Needed
- Plain doormat
- Stencils
- Outdoor paint
- Brush or sponge
10 Easy DIY Home Decor Steps for Beginners – Customized Doormat
- Plan Your Design: Choose a welcoming phrase or pattern for your doormat.
- Position Stencils: Place stencils on the doormat.
- Apply Paint: Use outdoor paint to fill in the stencils.
- Remove Stencils: Carefully remove the stencils once the paint is dry.
- Place at Entrance: Place your customized doormat at your front door for a personal touch.
DIY home decor projects are a fantastic way to add personality and style to your living space. These 10 easy DIY home decor steps for beginners are perfect for those looking to start their crafting journey. With minimal tools and materials, you can create beautiful, unique pieces that make your home truly yours. So, grab your crafting supplies and start transforming your home today!
FAQs
How long do these projects take?
Most of these projects can be completed in a few hours, although drying times for paint or glue may extend the overall time.
Are these projects kid-friendly?
Yes, many of these projects are suitable for kids with adult supervision, particularly the painted mason jars and photo display board.
What if I don’t have all the materials?
You can often substitute similar materials or find creative ways to work with what you have. For example, use different types of containers or fabrics.
Can these projects be used as gifts?
Absolutely! Handmade candles, custom wall art, and decorative throw pillows make excellent personalized gifts.
How do I ensure my projects turn out well?
Take your time, follow the instructions, and don’t be afraid to experiment. Practice makes perfect, and imperfections can add character to your creations.
Thank you so much for your kindness and support!
Warm regards